Disclosure: This page contains affiliate links. We earn commission if you click on a product link and make a purchase.
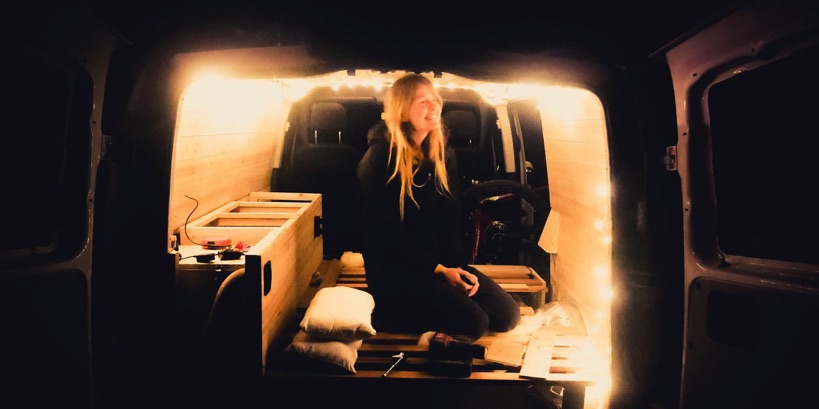
We’re both really into good lighting. Soft, warm, glowy lighting. We’ll never forget the moment (pictured above), when we first plugged in our LED string lights, and watched our cedar paneling just light up in the absolute perfect glow.
We had initially thought of using these just for mood lighting, and adding another set of brighter lights. But they were actually bright enough, so these are all we needed.
The lights are dimmable using the included remote controller, so when the wine comes out, the lights go low.
The string lights are 33 ft long, and we installed two of them. One runs along the four edges of the ceiling, and serves as the main light source. The other runs underneath the bed, and creates nice accent lighting in the front area of the van. This second strip also lights up the rear drawers, which is super useful when we’re searching for stuff in the dark.
Installation
We installed the lights onto the wall panels by pushing in some brass tacks into the panels, and then just wrapping the light strip around the tacks. The light strip is made of flexible copper, so they’re super easy to work with. For the section of the roof in the front of the van, we installed some screws directly into the headliner of the van, and wrapped the strip around those.
Wiring
These lights needed a bit of work to wire up. You might want to go through our Electrical System pages if you’re not familiar with electrical terminology.
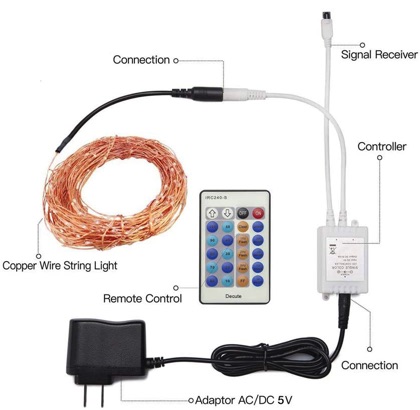
These lights are primarily intended for home use, so they come with a 110 V adapter. The adapter’s output is 5V. So… in order to power these lights from our van’s 12 V battery, we had to do some surgery.

The AC/DC adapter basically supplies 5V to the LED string lights via the barrel socket that plugs into the controller. We cut the cable between the adapter and the barrel socket, close to the socket’s end. On the inside, there are two wires – (+) and (-). We needed to connect these to the fuse block to supply power to the lights.
Since our supply is 12V, and the lights need 5V, we had to wire in a 12V – 5V step down transformer. Pretty simple – just connect the input wires to the fuse block using ring terminals, and the output wires to the barrel socket’s wires using butt connectors. Put in a 5 amp fuse for this connection, and you’re good to go!
If you want to avoid the surgery, just plug in the power adapter to a regular 110V power strip. It’s more efficient to power devices with 12V directly, but these lights are only 5W, so it won’t matter too much.
