Disclosure: This page contains affiliate links. We earn commission if you click on a product link and make a purchase.
The walls of your van, and what lie beneath them, provide the structural foundation and primary aesthetics for your build. They’re a pretty big deal. Each van – and van owner – is unique, and there are a lot of options in this arena. Here you’ll find the details on how we went about building the wall framework, from the first layer to the last.
Sound Deadening
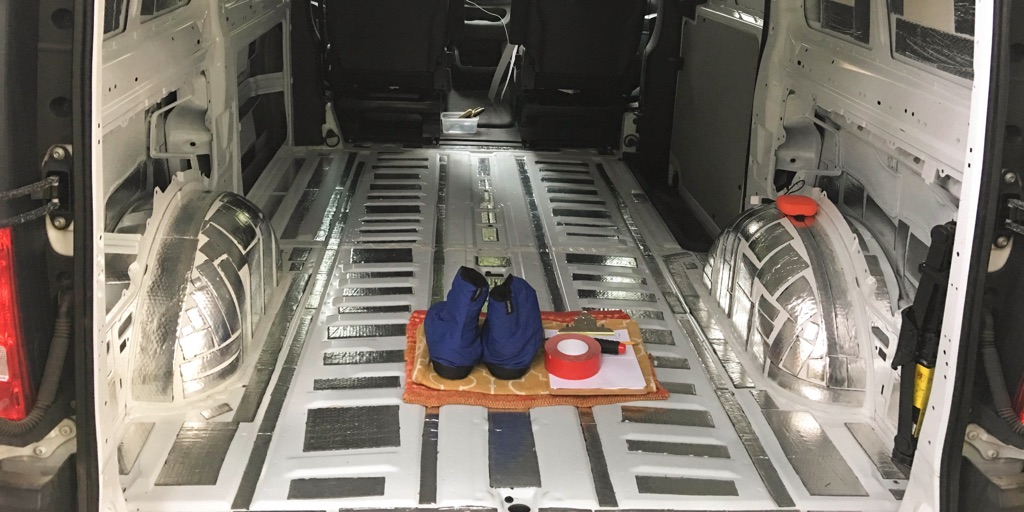
Before discussing insulation, let’s just take a brief moment to mention sound deadening. This was the very first thing we installed in the van. The empty van was super noisy to begin with, so we decided to put down a layer of Noico, prior to the insulation. After doing this, we drove the van around a bit, and it didn’t seem to make much difference to the noise level. It definitely wasn’t worth the extra cost and labor – and boy, was it laborious! But it’s there, so we thought we would mention it.
Insulation
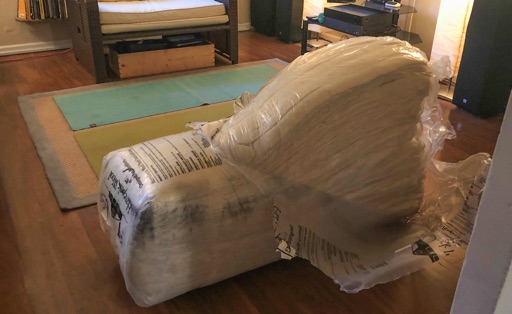
If you’ll be camping in cold weather, insulating your camper well is a must. There are several options for insulation – the most common being Thinsulate sheets and Polyiso boards. After doing some research, we decided to go with sheep’s wool from Havelock Wool. Thinsulate is pretty expensive, and Polyiso boards seemed to be a bit more difficult to work with – since they are so rigid, they need to be supplemented with lots of spray foam insulation. Plus, the prospect of using natural and sustainable insulation material really appealed to us.
We’re super happy with our sheep’s wool insulation. It was really fun to work with, and keeps the van nice and toasty!
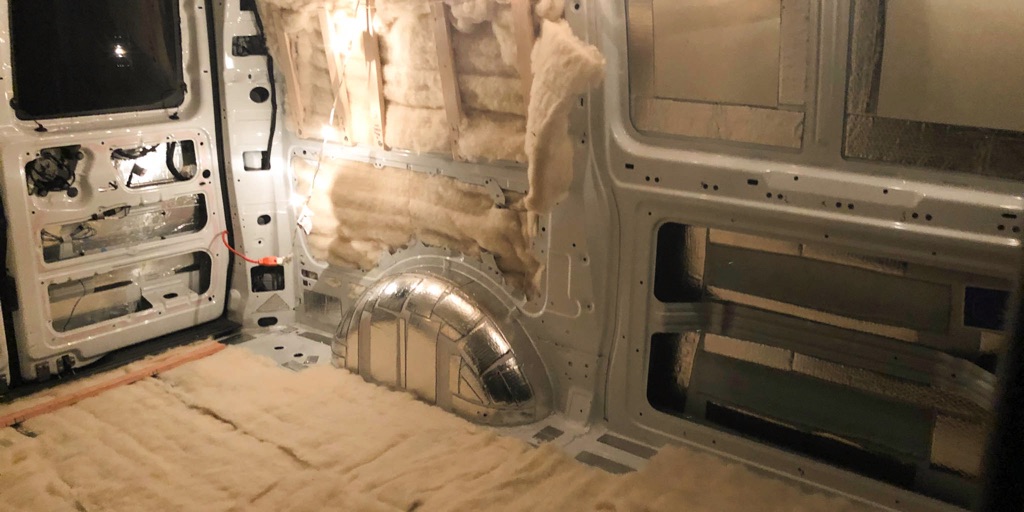
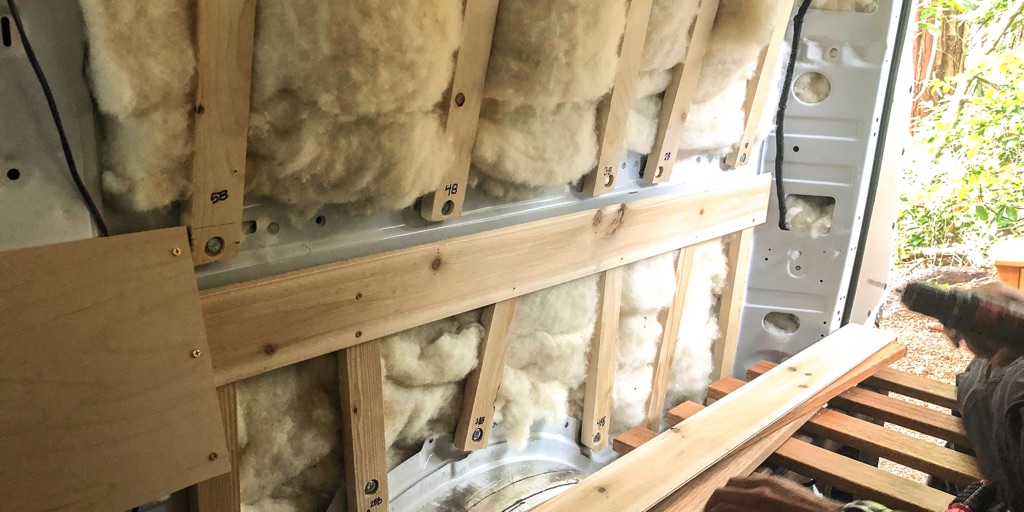
The wool comes in 2-inch thick batts, and you can just peel thinner layers off if needed, or tear it into smaller pieces for the pockets you are filling. It’s kind of like a massive sheet of cotton. Even the smallest holes can be filled by using a pencil to help ease in the wool. Apart from being easy to work with, we liked that the wool is a greener option, reasonably priced (we bought two batts for $300), and supports a small-scale business. And it left our van smelling phenomenal. Ahhh the subtle, sweet fragrance of clean sheep.
We stuffed wool under the floor, on the ceiling, in the walls and doors, and every nook and cranny we could find. Since Polyiso has a higher R-value, we did buy one 1/2″ board and used it for the ceiling, along with the wool. When it’s super cold out, we also cover the windows with a thin sheet of Reflectix.
Framework
One of the first things we struggled with, was figuring out how to attach the wall paneling to the van. There are just a few nuts welded to the inside of the body, but nowhere near enough to support a whole wall. The answer was Cross-Nuts (also called Plus Nuts or Rivet Nuts). They essentially allow you to install nuts onto the vehicle’s sheet metal body panels. They come in different sizes, so be sure to get the right size for your van walls.
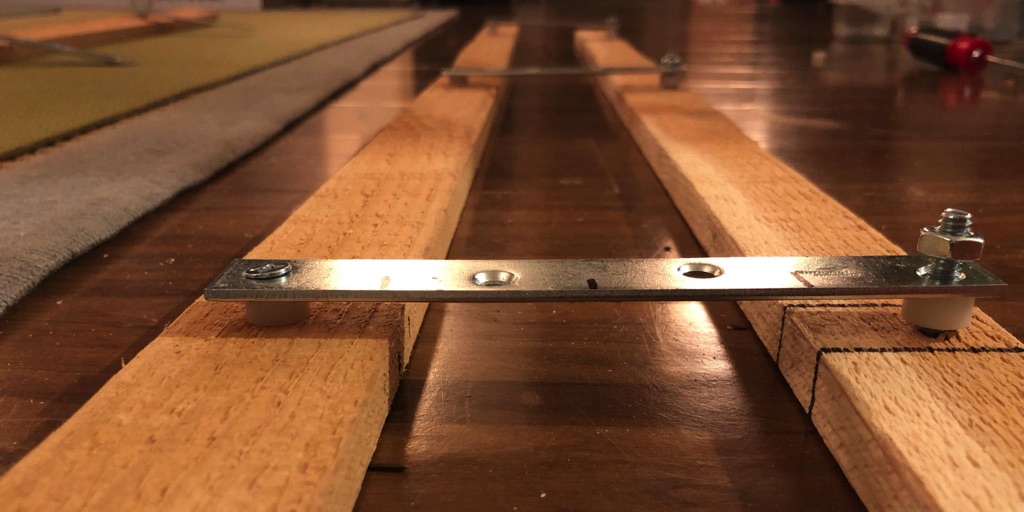
The above link for the cross-nuts that we purchased came with an installation tool and bolt. The tool is pretty basic, but it’s free and gets the job done. The photo below details how we used this simple tool to install our cross-nuts.
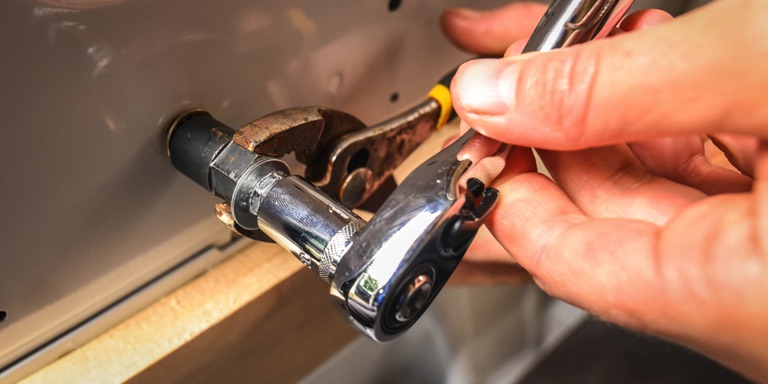
If using the basic tool to install your cross-nuts, the only other tools you’ll need are a wrench and a socket-wrench. The wrench holds the tool in place (which looks like a really long nut) and the socket-wrench is used to rotate the bolt inside of the cross-nut. Rotate until it is nice and tight, but not too tight! At this point, the backside of the cross-nut has nicely expanded and is properly secured to your van wall. To see the installation process, check out this video on how to install a cross-nut.
If you need a large number of cross-nuts, or if you already have a tool at hand, you can buy the cross-nuts without the tool. A friend of ours is building out a Mercedes Metris, and this is the DIY tool he put together to install his cross-nuts. No extra cost and works well!

If you want to get fancy and be more efficient with your cross nut install, there are tools out there that can help with that. The Astro Pneumatic Tool is one such tool. In our opinion, the added cost is not worth the savings in time and effort. But everyone has different priorities and budgets, so we wanted to be sure to throw that option out there.
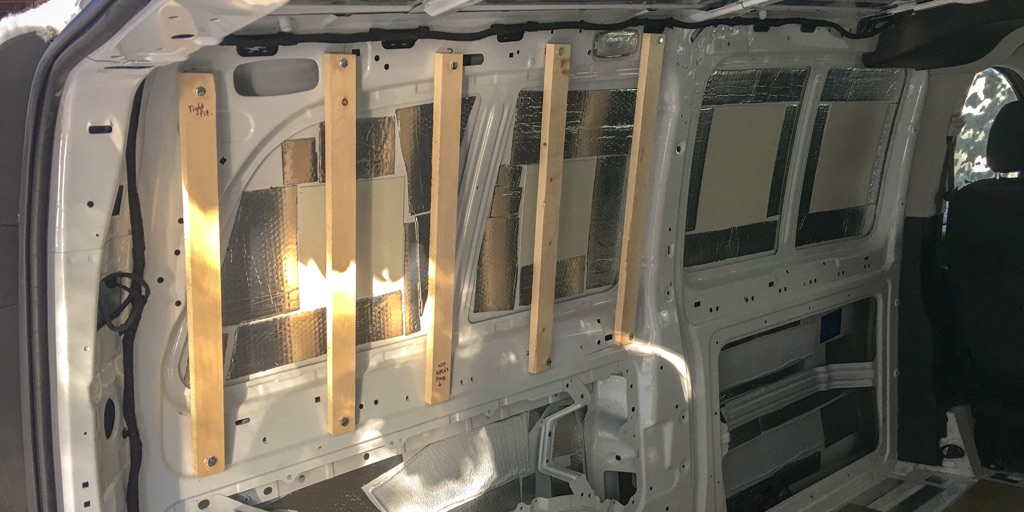
Once the Cross Nuts are installed, you can then use regular bolts to attach strips of wood to the van. These strips of wood (also called furring strips) form the supporting framework, to which you can attach your choice of wall paneling. We created a framework out of 1″ x 2″ pine strips.
Since the wall panels need to sit flush on the furring strips, the bolt head cannot be sticking out above the surface of the furring strip. For this, we used a Forstner bit to create a counter-bored hole for the bolt.
The Metris is far from having a perfect box shape – it’s got rounded corners and tapering walls. So each furring strip had to be cut according to the shape of the van.
Ceiling Framework
Figuring out how to attach furring strips to the ceiling was quite a challenge, since there was no way to install cross nuts. We couldn’t afford to lose much headroom, so our ceiling furring strips had to be much thinner than the walls, at about 1/4 in thick.
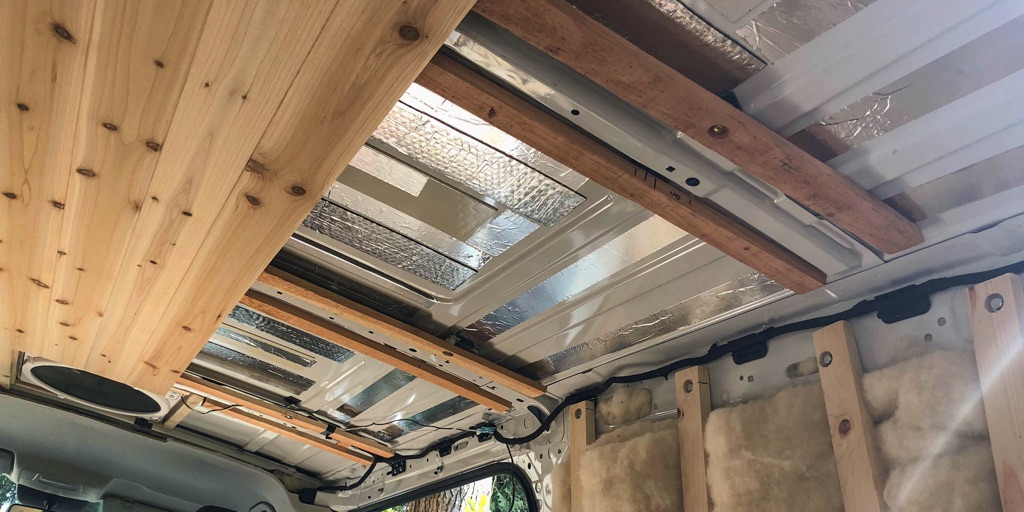
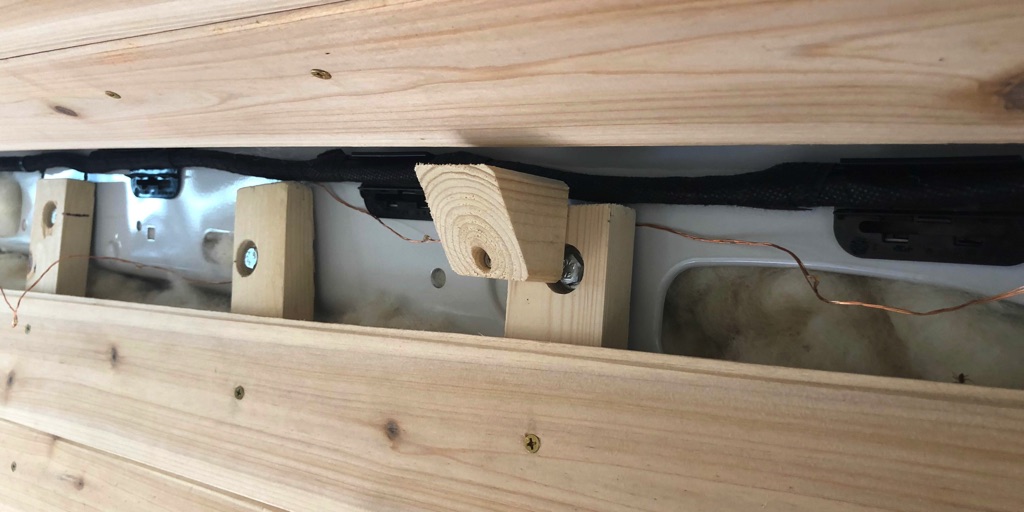
The van ceiling has reinforced cross members every 2 feet or so, which had three little gaps between itself and the roof, one on each end and one in the center. We used these gaps to slide a very thin steel bracket through, to which was bolted one of the furring strips. Once the furring strip / bracket assembly was passed through, we then attached the other furring strip to the bracket with a nut, bolt, and appropriate nylon spacer. This way, each cross member had 2 furring strips attached to it. There were three cross members, making it a total of 6 furring strips on the ceiling. This gave us plenty of support on which to install the wall panels.
Corner Framework
Apart from the walls and ceiling, we had to figure out the support structures for the corners as well. This was a real problem area for us, and it was left unfinished for quite a while. Navigating these ‘problem areas’ just takes a bit of creativity and trial and error. We ended up making small blocks of wood, cut at an angle, and screwed to the wall furring strips. We were then able to screw a wall panel onto this angled block. This was quite makeshift, but it seems to have held up pretty well.
Wall Paneling
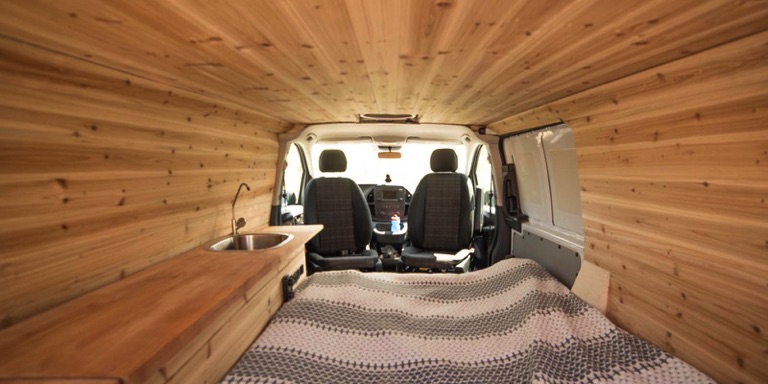
Insulation and framework can be slow going. Framework, especially, can get tedious. But installing panels goes really quickly and is so satisfying. And that’s when the look of the van really came together.
This is what we had been waiting for.
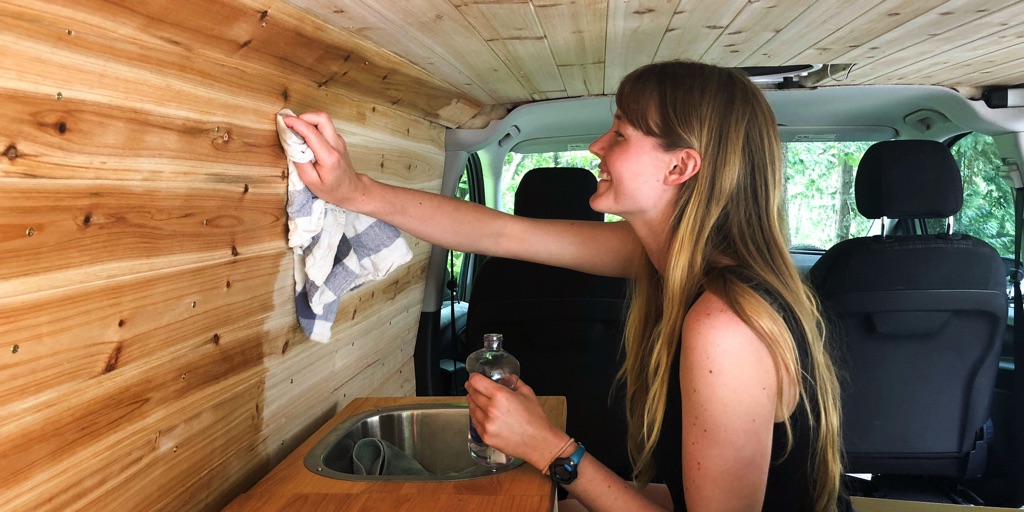
Our panels are 8ft long, 1/4 in tongue and groove cedar panels, and we’re super happy with them. The panels are thin enough to bend with the van’s curves, and were easy to install. They’re also not very expensive, and look great. And the smell… mmmm! Now our van not only smells of sheep, but of cedar trees as well!
We attached the panels to our furring strips with small brass screws. Just be careful when you’re doing this, and pay attention to where the bolts are located on the furring strips, so you can avoid those spots when screwing the panels in. It’s best to make small marks on the panels where may have bolts underneath them.
A couple of panels, especially near the upper part of the wall, may need to be trimmed at odd angles in order to fit snugly. While working with the panels, just keep in mind that they are a bit fragile. The tongue is particularly prone to breaking. But as long as you’re careful, this should not be an issue.
Once the panels were installed, we applied a layer of mineral oil on them. This not only helps to protect the wood, but it also brings out the grain. We really liked the effect it had on the look of the cedar.
Finishing the edges
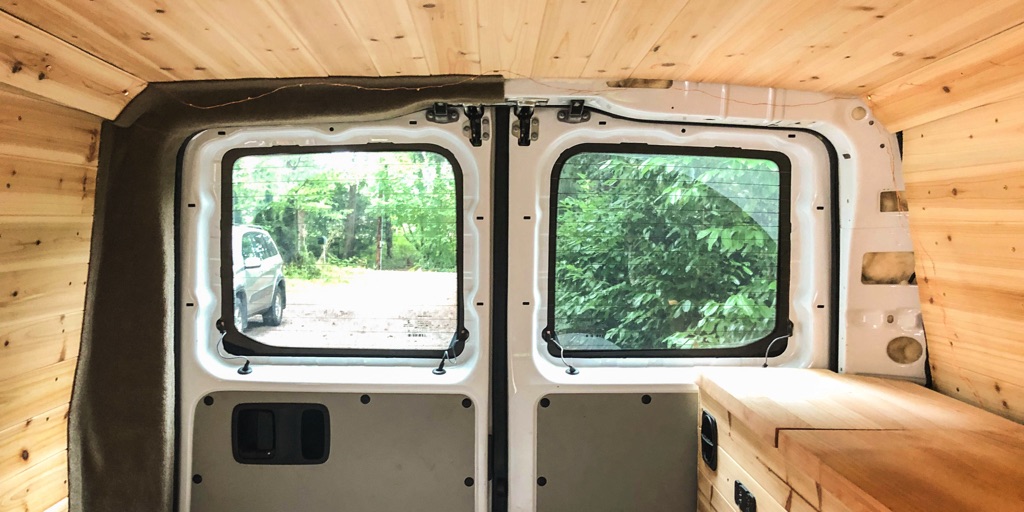
After installing the paneling, we were left with a lot of unfinished corners and edges, which we just couldn’t figure out how to cover up. Automotive carpeting did the trick! We used spray adhesive to stick the carpeting to the surfaces underneath. It was very easy to make the carpeting conform to any area, and it adhered within seconds. Time has tested its strength, and so far so good! We found that the pricier stuff works much better than the cheaper alternatives.
We utilized the carpeting for other areas of the van as well, including the base of our side door pockets, and a liner for our pantry boxes.

For the floor, we glued thin vinyl flooring panels directly to the grey plywood floor that came with the van. We found a box of the flooring panels at our local Re-Store for about $5 (these stores often have lots of building surplus materials). We only installed flooring in the front half of the van, so one box of panels was more than enough.
These panels worked out really well for the van floor – installation was quick, it looks great, and is easy to clean and keep dry.