Disclosure: This page contains affiliate links. We earn commission if you click on a product link and make a purchase.
This van boasts ten (yes, 10) USB ports, two 110V wall sockets and a 12V socket. That’s apart from permanently installed chargers for five (yes, 5) cameras. Overkill? Not when photography is your hobby, you’re a gear junkie, and own way too many cameras.
Now, we never have to search around for a charged battery. There’s always one (actually, two) for each camera, waiting in this little charging station shelf which we installed in the heater / propane area.
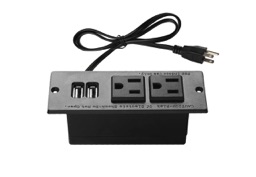
For the 110V wall sockets, this recessed power strip meant for conference room tables was perfect. We just had to cut a hole in the counter wall using a jig saw, slide the power strip right in, and screw it from the front. It plugs in to our inverter, with a 6 ft extension cable.

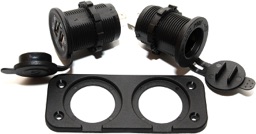
We also installed a couple of USB ports, and a 12 V socket. To install these, we cut a hole in the counter wall using a 1″ hole saw. Just slide the ports in from the front, and tighten them down from the back with the included fastening ring. The rubber coverings are all removable.

These ports have male spade connectors on the rear – and they come with a set of female spade connectors, which you can install on your wiring. Check out our Wiring Basics page to learn more about these spade connectors, and how they are to be wired. The wires can be directly connected to your fuse box. We used a 5A fuse for the USB charger, and a 10A fuse for the 12V socket.
The only problem with the USB ports is that you can’t turn off the LED lamp, so we just used a small drill bit to destroy it. Just point the drill at the LED, and keep going till the light goes out. The actual LED is pretty deep in there, but we eventually got it.